Showing posts with label server. Show all posts

Installing VPN server on Windows 2003

  Installing VPN server on Windows 2003

 ________________________________________

Follow us on Facebook

Follow us on Google+

________________________________________


Presentation

A virtual private network (VPN) is a way to connect to a private network through a public network is the Internet. It combines the advantages of remote connection with a remote access server with the ease and convenience of Internet connection

The solution to install a VPN server in Tissea SARL allow the remote sites can access the network seamlessly and securely. Therefore, it was necessary to link these sites together so they can share resources and materials to increase their productivity.

Communication between sites

Before the emergence of the company VPN to connect these multiple physical networks, it y'avait one
dedicated line that carried a WAN between these networks for a while. The main purpose of the VPN
was to allow a remote machine to a network (eg Marrakech) to access by
the Internet, and all ensuring security of data exchanged. This is
established, once connected to the Internet, the user can create a VPN between your machine and the remote network.
Here is a concrete illustration picture:


Components of a VPN server

explanations

In Windows 2003, the protocol virtual private network consists of the following components:

1 VPN server, 1 (n) client (s) VPN, 1 VPN connection (this is the part of the connection in which the data are encrypted) and the tunnel (the portion of the connection in which the data is encapsulated).

Tunneling is done through one of the tunneling protocols included with Windows 2003
(existing in 2000), which are both installed with Routing and Remote Access, or
service called "RRAS" (Routing and Remote Access). The two major tunneling protocols
included with Windows 2003 are:

- PPTP (Point-to-Point Tunneling Protocol), which provides data encryption using the Point to Point Encryption Microsoft Corporation.


- L2TP (Layer Two Tunneling Protocol) that provides encryption, authentication, and integrity
data using IPSec.
Note, however it is recommended that your Internet connection uses a dedicated line
T (n) or fractional frame relay. The WAN adapter must be configured with the IP address and
subnet mask assigned to your domain or supplied by a provider, as well as the gateway
default ISP router.

Differences between PPTP and L2TP/IPSec

We have seen that Windows 2003 supports two VPN protocols that are:
- PPTP (point to point tunneling protocol)
- L2TP (Layer 2 Tunneling Protocol).
PPTP uses MPPE encryption method (Microsoft Point to Point Encryption) while
L2TP is based on IPSec. However, for encrypted communication with PPTP
it is necessary to have used the following methods of authentication:
- MS-CHAP v1 or v2
- EAP / TLS for smart cards.
(IPSec requires no particular authentication method)


The method MPPE to encrypt on 40.56 and 128-bit to use the 128-bit encryption it was necessary to have installed the High encryption pack (included in the service pack3) and install a patch for versions correction Windows 95 and 98 but with Windows 2003 it is resolved.
Here is a table of the main features of PPTP and L2TP


Installation on Windows 2003 Server

Installation and activation of vpn


To install and activate a VPN server on Windows 2003 server, follow these steps:
1) Firstly, the VPN unit with Microsoft Windows 2003, confirm that the connection to the Internet and connect to your local area network (LAN) are both configured correctly, this is important for the next steps :
2) Click Start, point to Administrative Tools, and then click Routing and Remote Access.


3) Click on the server name in the tree, and then click Configure and Enable Routing and Remote Access on the Action menu. Click Next.


4) In the Common Configurations dialog box, click Virtual Private Network (VPN server)
then click Next.


5) In the Protocols dialog box remote client, confirm that TCP / IP is included in the list;
click Yes, all protocols are available in the list, then click Next.
6) In the Internet Connection dialog box, select the Internet connection you used to
connect to the Internet, then click Next.
7) In the dialog box, IP address assignment, select Automatically to use the
DHCP server on your subnet to assign IP addresses to remote access clients and
server.
8) In the dialog box Managing multiple remote access servers, confirm that the check
select No, I do not want to configure this server to use RADIUS now activated.


9) Click Next, then click Finish.
10) Click the right mouse button on the node Ports, and then click Properties.
11) In the Properties dialog box of ports, click the device WAN Miniport (PPTP), and then click Configure.
12) In the dialog Configure Device - WAN Miniport (PPTP), this possibility is offered to you:
NB: If you do not want to support a VPN user dialup modems direct
installed on the server, clear the checkbox dial routing connections on demand (inbound and outbound).
13) Enter the maximum number of simultaneous PPTP connections you want to allow in the area
text Maximum ports. (This number may depend on the number of available IP addresses.)
14) Repeat steps 11 through 13 for the L2TP device, and then click OK.

VPN server configuration


Configuring the remote access server as a router
For our remote access server to forward traffic correctly on your network, you
must configure it as a router with either static routes or routing protocols,
so that all sites on the intranet are reachable from the same remote access server.
To configure the server as a router:
1) First, click Start, point to Administrative Tools, and then click Routing and
Remote Access.
2) Right-click on the server name, and then click Properties.

3) On the General tab, select Enable this computer as a router.
4) Select Routing for LAN routing only or LAN and dial
demand. Finally click on "OK" to close the Properties dialog box.
Configuring PPTP ports

Confirm the number of PPTP ports you need. To check the number of ports or add ports, follow these steps:

1) Click Start, point to Administrative Tools, and then click Routing and Remote Access.
2) In the console tree, expand Routing and Remote Access, expand the name of
server, and then click Ports.
3) Click with the right-click Ports, and then click Properties.
4) In the Properties dialog box of ports, click Port Mini WAN (PPTP), and then click Configure.
5) In the dialog Configure Device, select the maximum number of ports
the device, and then select the options to specify whether the device accepts
incoming connections only or both incoming and outgoing connections.

How to allow a user to connect to a VPN server installed on a Windows 2003 Server platform?

1 - Click on Start \ Administrative Tools \ Users and Computers or
Run: dsa.msc
2 - Select the desired user, display the context menu with the right mouse button, select
Properties.


3 - In the Dial-in tab, check the Allow Access.


The user is able to connect to the VPN.

Managing addresses and name servers


The VPN server must have IP addresses available, it must indeed assign to the virtual interface
VPN server and VPN client during IPCP negotiation phase (IP Control Protocol)
connection process. The IP address assigned to the VPN client is assigned to the virtual interface of the client
VPN.
For Windows 2003 VPN server, the IP addresses assigned to VPN clients are obtained by
Addressing DHCP by default. You can also configure a group of static IP addresses. the
VPN server must also be configured with name resolution servers (usually
addresses of DNS and WINS servers) to assign to the VPN client during the IPCP negotiation.
 

Vpn connection from a client 2000/XP

Creation of client connection

In the network connection settings, click Create a new connection:


Then click Next on the appearance of the window.
Then you will be asked to choose the type of connection:


Then, after clicking Next, choose VPN connection:


After validate this choice, enter the name of the company:


Then enter the address or name of the VPN:
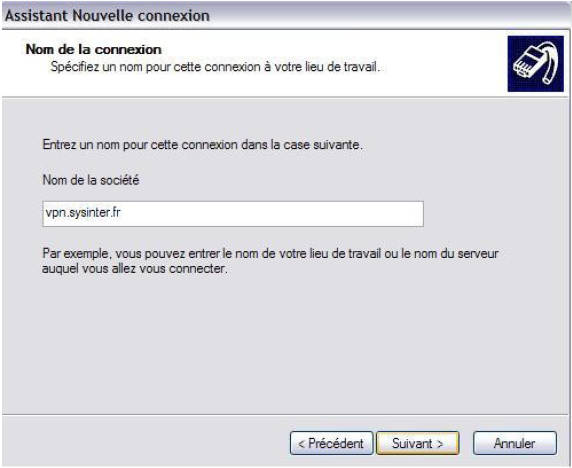

Click Next, and then confirm the creation of the connection can be made a shortcut on the desktop for users "delta" can connect easily.

Client Connection Configured


Click the shortcut to clean the connection, enter your user name and the password and not the area provided by your network administrator and click "connect"


You now have in your corporate network:


conclusion


For a business, choosing to set up a VPN for remote sites and positions can be very
useful.

Indeed a low cost per reports the assets it can bring the VPN itself as a
complete and reliable solution to connect remote networks between them. Nowadays, performance and
the capacity of Internet access whether for domestic or professional help
use this technology without constraints.

For the customer, the usage is very simple and the user can work from home while recording their data on the server of its usual business for example and those responsible for the installation, except for updates configuration, there's little maintenance.

VPNs are inexpensive solutions compared to the price of leased lines and
allowing secure access to a corporate network.

Installing a Server Exchange 2010 (Video)


 Installing a Server Exchange 2010 (Video)


In this article, we will see the installation of Exchange 2010 called classical mono server. In other articles I publish here some time, we see the principles and pitfalls of installations and configurations mode Exchange 2010 servers exploded. For example, the NLB, the DAG network ... ... Anyway, many tricks avoiding all the pitfalls of installing Exchange 2010.


 ________________________________________

Follow us on Facebook

Follow us on Google+

________________________________________ 

Présentation Exchange 2010:

Firstly, I will not rewrite history and there are a multitude of articles on the net talking about Exchange 2010, advantages and disadvantages of this email widely used at present in our businesses ...

I'll just put a link on the commercial presentation of Exchange:
Exchange 2010

Installation Exchange 2010:

Prérequis

The following roles are required for the installation of exchange
  • .NET Framework 3.5.1 Features Active Directory Domain Services Tools
  • AD DS Tools
  • Web Server (IIS)
  • Basic Authentication
  • Windows Authentication
  • Digest Authentication
  • IIS 6 Metabase Compatibility
  • .NET Extensibility
  • IIS 6 Management Console
  • Process Model (dans Windows Process Activation Service)
  • Web Server (IIS) Tools (dans Remote Server Administration Tools)
  • ISAPI Extensions
  • Dynamic Content Compression
  • HTTP Activation (dans .Net Framework 3.5.1 Features)
  • RPC over HTTP Proxy
The installation is done via PowerShell command line:

Import-Module ServerManager
Add-WindowsFeature NET-Framework,RSAT-ADDS,Web-Server,Web-Basic-Auth,Web-Windows-Auth,Web-Metabase,Web-Net-Ext,Web-Lgcy-Mgmt-Console,WAS-Process-Model,RSAT-Web-Server,Web-ISAPI-Ext,Web-Digest-Auth,Web-Dyn-Compression,NET-HTTP-Activation,RPC-Over-HTTP-Proxy -Restart
 Once installed components we set the service to automatic NetTcpPortSharing:

 Set-Service NetTcpPortSharing -StartupType Automatic


Preparing Active Directory :


Before installing we must prepare Active Directory to receive Exchange. From the CD or ISO Exchange 2010. The following commands extend the schema, domain ...:
Setup /PrepareLegacyExchangePermissions (spécifique pour 2003)
Setup /PrepareSchema
Setup /PrepareDomain
Setup /PrepareAD  /OrganizationName: OboLab (nous pouvons donner un nom d’organisation Exchange 2010 propre à l’entreprise)


Installation d’Exchange:


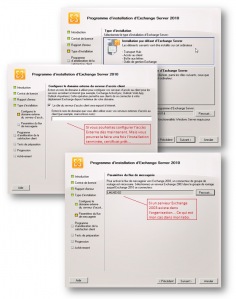
The installation of the Exchange 2010 server in mono is done via the GUI. Very simple, just read properly what is requested and click "Next" and "Finish" ... Nothing complicated ...


Installing a Server Exchange 2010 (Video)


LDAP Server installation and Configuring directory (OpenLDAP Linux)


 LDAP  Server installation and Configuring directory (OpenLDAP Linux)

 ________________________________________

Follow us on Facebook

Follow us on Google+

________________________________________


Présentation:

LDAP server is a database in which information is recorded in the form of a hierarchical tree.

Vérification :

   rpm -q openldap

suppression:

   rpm -e openldap


Installation


installation from Computer :

   rpm  -ivh openldap


installation from Internet:


    yum install openldap


Configuration:


We'll just configure the bare minimum for ldap works. We will come back to finish it later conf

So you have to edit the file / etc / ldap / slapd.conf

find rows

# The base of your directory in database #1
suffix          "blabla"

and replace with

# The base of your directory in database #1
suffix          "dc=domain,dc=net"

By convention we put the same suffix as the dns ldap. As for now we do not have the domain name I took Braveo mdl29

We will activate your account in the ldap admin with the password "password" Note that we keep the good suffix is easier

still in the file / etc / ldap / slapd.conf


rootdn  "cn=admin,dc=domain,dc=net"
rootpw  password

Pabon the password is not clear is terrible we will sha hashed in a console you type

slappasswd -h {sha}

it will ask you the password and reapply

New password: 
Re-enter new password: 


if you put password as the password it should give you

{SHA}W6ph5Mm5Pz8GgiULbPgzG37mj9g=

You copy the line and paste it into the rootpw slapd.conf file after giving

rootdn  "cn=admin,dc=domain,dc=net"
rootpw  {SHA}W6ph5Mm5Pz8GgiULbPgzG37mj9g=

Well, now you'll have to replace all occurrences or appears "cn = admin, dc = lallal" with "cn = admin, dc = domain, dc = net"

access to attrs=userPassword,shadowLastChange
        by dn="cn=admin,dc=domain,dc=net" write
        by anonymous auth
        by self write
        by * none


which changes the rights to the ldap userPassword for fields and shadowLastChange. admin has full access, it can read and write the owner can also change their own field and finally no access to the rest of the world

and finally we allow everyone to read the ldap


access to *
        by dn="cn=admin,dc=admin,dc=net" write
        by * read


We'll do a little test connection. On the server we will restart the LDAP so that they take into account our changes.

/etc/init.d/slapd restart


then we will do a search in the ldap connecting with the ldap admin account

ldapsearch -D "cn=admin,dc=domain,dc=net" -x -W


There is one but it does not give error. LDAP works

Now we will add fields in ldap. To do this we will modify the schema by adding the latest version of the qmail.schema
It is available at  LDAP

 Must copy it into the directory / etc / ldap / schema.

Then it must be declared in the file / etc / ldap / slapd

after the block is available


# Schema and objectClass definitions
include         /etc/ldap/schema/core.schema
include         /etc/ldap/schema/cosine.schema
include         /etc/ldap/schema/nis.schema
include         /etc/ldap/schema/inetorgperson.schema

Must add a line

include         /etc/ldap/schema/qmail.schema

save and reboot
creating users

well our LDP works but it is empty. We'll fill it with a file in ldif format. for example braveo.ldif

er user here has more information than is needed, but it serves to illustrate the content of a ldap


dn: dc=domain,dc=net
objectClass: organizationalUnit
objectClass: dcobject
dc: mdl29
ou: mdl29


dn: ou=Users,dc=mdl29,dc=net
objectClass: organizationalUnit
ou: Users


dn: ou=groups,dc=mdl29,dc=net
objectClass: organizationalUnit
ou: groups


dn: ou=Fonctions,dc=mdl29,dc=net
objectClass: organizationalUnit
ou: Fonctions


dn: ou=Associations,dc=mdl29,dc=net
objectClass: organizationalUnit
ou: Associations

dn: uid=42,ou=Users,dc=mdl29,dc=net
objectClass: top
objectClass: person
objectClass: organizationalPerson
objectClass: inetOrgPerson
objectclass: qmailuser
mailhost: mail1.mdl29.net
cn: bjensen
displayName: Babs Jensen
sn: Jensen
givenName: Barbara
initials: BJJ
uid: 42
mail: bjensen@mdl29.net
telephoneNumber: +1 408 555 1862
facsimileTelephoneNumber: +1 408 555 1992
mobile: +1 408 555 1941
roomNumber: 0209
carLicense: 6ABC246
o: Siroe
ou: Product Development
departmentNumber: 2604
employeeNumber: 42
employeeType: full time
preferredLanguage: fr, en-gb;q=0.8, en;q=0.7
userPassword: 123456
labeledURI: http://www.siroe.com/users/bjensen My Home Page

must stop ldap

/etc/init.d/slapd stop
 
delete the file ldap
 
rm -rf /var/lib/ldap/*
 
then populate the ldap
 
slapadd -l braveo.ldif 
 
change the permissions on the directory ldap
 
chown -R openldap:openldap /var/lib/ldap/    

ldap start

/etc/init.d/slapd start
 
 
to test

ldapsearch-x-jensen@domain.net mail = bdc = domain, dc = net-h localhost                                               


 LDAP  Server installation and Configuring directory (OpenLDAP Linux)


Configuring a Samba Server Linux


 ________________________________________

Follow us on Facebook

Follow us on Google+

________________________________________

Introduction:

Samba is a popular open-source program, which provides file and print services to Microsoft® Windows® clients. With  users, groups, resources are created and managed on a Samba server. As a Linux client, you can use Calculate Linux Desktop or another gentoo-based distribution with the installed calculate-client package. As a Windows client various Windows OSes can be used. To configure the server and the client see Migration to Linux. Any program configured with calculate-server is named "service".
The samba service configures Samba.
This service must be explicitly specified for calculate-server.
Example of adding the test user:
cl-useradd test samba
For users, access rights for server's file resources are the same for Linux and Windows systems.
Samba is included in  Directory Server. If you use another gentoo system, Samba can be installed with portage: just run emerge net-fs/samba.

Configuring the server


To configure your server, you should use the calculate-server utilities. Begin by making sure that you have configured the LDAP and the Unix servers.
To configure the Samba server execute:
cl-setup [parameters] samba
Possible parameters are netbios and workgroup.
  • "-n name" sets the NetBIOS name, that will be used by the Samba server. It defaults to the first component of the DNS host name.
  • "-w workgroup" is the domain name or the NT workgroup name, for computers that will access the server.
If the Samba server is a PDC (Primary Domen Controller), you should set the administrator's password, i.e. the password for the admin user.
cl-passwd --smb admin  samba
If you need domain administrator for windows computers, add new user which will be included into domain group "Domain Admins", or include in this group existing user.
The admin user only connects the client Windows machine to the domain and has no home directory.
If you need a domain administrator to manage Windows computers, add a new user that will be added in the domain group "Domain Admins"; an existing user might as well be added to this group.
Example of creating the domain administrator:
cl-useradd -p --gid "Domain Admins" -c "Domain administrator" d_admin samba
If you want to connect Unix clients, set the password for the client service user.
cl-passwd --smb client samba
 

Add and remove users


To manage users, the following commands are used: cl-useradd, cl-userdel, cl-usermod, cl-passwd, cl-groupadd, cl-groupdel, cl-groupmod. Their syntax is the same as for the analagous Unix commands.
Instead of smbpasswd, use cl-passwd for changing users' passwords, including the one for the administrator of Windows computers.
Example of adding the test user:
cl-useradd test samba
Example of changing password for the test user:
cl-passwd test samba
Example of adding a user to the primary group Domain Admins:
cl-useradd -g 'Domain Admins' test samba
Note that the samba option is appended to the command.

Set permissions

Setting access rights to the filesystem

To set file permissions on the server, use the ACL (Access Control List). By changing files permissions, you can restrict access to them; this applies both to Windows and Linux clients.
Access rights apply to files as well as to directories. You can specify the permissions on the file's owner or the group. While the Windows client will only recognize the Samba group, the Linux system will display the names of both Unix and Samba groups. Therefore, is preferable to use the Samba group to set access rights.
To create a Samba group, named "manager", type:
cl-groupadd manager samba
To create a Unix group, named "job", execute:
cl-groupadd job unix
Detailed configuration of access rights using ACL is described in "Setting filesystem ACL"

Configuring access rights for Windows users

How to change access rights to shared files on the server is described above.
To configure additional rights on Windows machines, such as: the ability to install programs, to exit the domain, etc., use the Samba group.
Example of granting the test user with the domain administrator rights:
cl-groupmod -a test 'Domain Admins' samba

Structure of Samba groups

Samba groups can be of the following types:
  • Domain Groups (type 2)
  • Local groups (type 4)
  • Built-in groups (type 5)  
Groups created  default
Domain groups


Domain groups are Global groups that operate in the domain.
  • Domain Admins have full access to the domain computers.
  • Domain Guests have minimal rights.
  • Domain Users
  • Domain Computers

Local groups


Local groups are used locally on the computer.
There are no local groups.


Built-in groups


Built-in groups are groups built into the system.
  • Administrators have full rights.
  • Account Operators create and manage user account information, create and manage groups, backup files and directories.
  • Backup Operators backup, restore from a backup, halt the system.
  • Print Operators manage printers and make backups.
  • Replicators. This group is used by FRS File Replication on domain controllers.
  • System Operators change the system time, halt the system, shutdown from a remote system, backup, restore from backup, lock the server or override the server lock, format the hard disk when needed, manage network directories, handle printers.

Creating a Samba group

Creating the domain group test. By default, a domain group is created, group type 2.
cl-groupadd test samba
Creating a built-in group Power Users for users with additional rights:
cl-groupadd -g 547 --rid 547 -t 5 'Power Users' samba
Where:
  • g is the identifier of group 547 (Group ID)
  • rid is the unique identifier 547 (RID)
  • t is the group type 5 (built-in group)
  •  

Viewing information

To view information about users and groups on the server, use the cl-info command:
Listing all unix users:
cl-info -u unix
Listing all samba users:
cl-info -u samba
Getting info about a unix service user:
cl-info -U <user name> unix
Getting info about a samba service user:
cl-info -U <user name> samba
Listing all existing groups for the unix service:
cl-info -g unix
Listing all existing groups for the samba service
cl-info -g samba
Getting info about the unix service group:
cl-info -G <group name> unix
Getting info about the samba service group:
cl-info -G <group name> samba


Configuring a Samba Server Linux (Video)


 ________________________________________

Follow us on Facebook

Follow us on Google+

________________________________________