Showing posts with label Video. Show all posts

Installing a Server Exchange 2010 (Video)


 Installing a Server Exchange 2010 (Video)


In this article, we will see the installation of Exchange 2010 called classical mono server. In other articles I publish here some time, we see the principles and pitfalls of installations and configurations mode Exchange 2010 servers exploded. For example, the NLB, the DAG network ... ... Anyway, many tricks avoiding all the pitfalls of installing Exchange 2010.


 ________________________________________

Follow us on Facebook

Follow us on Google+

________________________________________ 

Présentation Exchange 2010:

Firstly, I will not rewrite history and there are a multitude of articles on the net talking about Exchange 2010, advantages and disadvantages of this email widely used at present in our businesses ...

I'll just put a link on the commercial presentation of Exchange:
Exchange 2010

Installation Exchange 2010:

Prérequis

The following roles are required for the installation of exchange
  • .NET Framework 3.5.1 Features Active Directory Domain Services Tools
  • AD DS Tools
  • Web Server (IIS)
  • Basic Authentication
  • Windows Authentication
  • Digest Authentication
  • IIS 6 Metabase Compatibility
  • .NET Extensibility
  • IIS 6 Management Console
  • Process Model (dans Windows Process Activation Service)
  • Web Server (IIS) Tools (dans Remote Server Administration Tools)
  • ISAPI Extensions
  • Dynamic Content Compression
  • HTTP Activation (dans .Net Framework 3.5.1 Features)
  • RPC over HTTP Proxy
The installation is done via PowerShell command line:

Import-Module ServerManager
Add-WindowsFeature NET-Framework,RSAT-ADDS,Web-Server,Web-Basic-Auth,Web-Windows-Auth,Web-Metabase,Web-Net-Ext,Web-Lgcy-Mgmt-Console,WAS-Process-Model,RSAT-Web-Server,Web-ISAPI-Ext,Web-Digest-Auth,Web-Dyn-Compression,NET-HTTP-Activation,RPC-Over-HTTP-Proxy -Restart
 Once installed components we set the service to automatic NetTcpPortSharing:

 Set-Service NetTcpPortSharing -StartupType Automatic


Preparing Active Directory :


Before installing we must prepare Active Directory to receive Exchange. From the CD or ISO Exchange 2010. The following commands extend the schema, domain ...:
Setup /PrepareLegacyExchangePermissions (spécifique pour 2003)
Setup /PrepareSchema
Setup /PrepareDomain
Setup /PrepareAD  /OrganizationName: OboLab (nous pouvons donner un nom d’organisation Exchange 2010 propre à l’entreprise)


Installation d’Exchange:


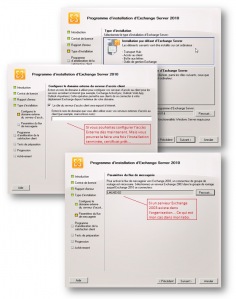
The installation of the Exchange 2010 server in mono is done via the GUI. Very simple, just read properly what is requested and click "Next" and "Finish" ... Nothing complicated ...


Installing a Server Exchange 2010 (Video)


How to Install Active Directory ( Contrôleur de domaine ) + Video


              Active Directory ( Contrôleur de domaine ) is essential to any Microsoft network built on the client-server network model–it allows you to have a central sever called a Domain Controller (DC) that does authentication for your entire network. Instead of people logging on to the local machines they authenticate against your DC. Lets take a look at how to install Microsoft’s Active Directory.
 

Installation: 

Open Server Manager and click on roles, this will bring up the Roles Summary on the right hand side where you can click on the Add Roles link.
Roles Wizard where you can click on next to see a list of available Roles. Select Active Directory Domain Services from the list, you will be told that you need to add some features, click on the Add Required Features button and click next to move on
Active directory


A brief introduction to Active Directory will be displayed as well as a few links to additional resources, you can just click next to skip past here and click install to start installing the binaries for Active Directory.


When the installation is finished you will be shown a success message, just click close


Configuration:

 
Open up Server Manager, expand Roles and click on Active Directory Domain Services. On the right hand side click on the Run the Active Directory Domain Services Installation Wizard (dcpromo.exe) link.

This will kick off another wizard, this time to configure the settings for you domain, click next to continue.

The message that is shown now relates to older clients that do not support the new cryptographic algorithms supported by Server 2008 R2, these are used by default in Server 2008 R2, click next to move on.

Choose to create a new domain in a new forest.

Now you can name your domain, we will be using a .local domain the reason why will be explained in an upcoming article.
Since this is the first DC in our domain we can change our forest functional level to Server 2008 R2.
We want to include DNS in our installation as this will allow us to have an AD Integrated DNS Zone, when you click next you will be prompted with a message just click yes to continue.
 

You will need to choose a place to store log files, it is a best practice to store the database and SYSVOL folder on one drive and the log files on a separate drive, but since this is in a lab environment I will just leave them all on the same drive.

Choose a STRONG Active Directory Restore Mode Password and click next twice to kick off the configuration.

 
You will be able to see what components are being installed by looking in the following box.

 When its done you will be notified and required to reboot your PC.

That’s all  there is to it guys, now you have a working installation of Active Directory.

How to Install Active Directory ( Contrôleur de domaine )